OpenOffice: Създайте времева линия - как работи
В това ръководство обясняваме стъпка по стъпка как да създадем времева линия в OpenOffice.
Създайте времева линия в OpenOffice Draw
Можете да поставите времева линия в OpenOffice Draw и след това в OpenOffice Writer:
- Отворете нова страница в OpenOffice Draw.
- След това щракнете върху бутона със стрелка и плъзнете дълга стрелка отляво надясно в документа.
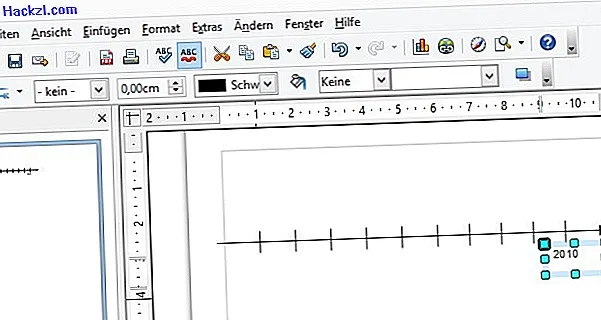
- След това трябва да поставите отделни секции на вашата времева линия. Това работи с бутона линия.
- Първо поставете ред на времевата линия и след това го копирайте с клавишната комбинация [Ctrl] + [C].
- С [Ctrl] + [V] можете да вмъквате линията толкова често, колкото искате и да я позиционирате точно с клавишите със стрелки.
- С бутона "T" по желание можете да добавите текст, например години за секциите на времевата линия.
- Вече можете да запазите готовата времева линия като PNG файл чрез „File“> „Export“.
- В OpenOffice Writer щракнете върху "Вмъкване"> "Изображение"> "От файл" и изберете времевата линия, която току-що създадохте.