
Photoshop: премахнете жълт нюанс - как работи
Можете лесно да премахнете нежеланите цветови промени като жълт нюанс във Photoshop. В този практичен съвет ви показваме как да продължите.
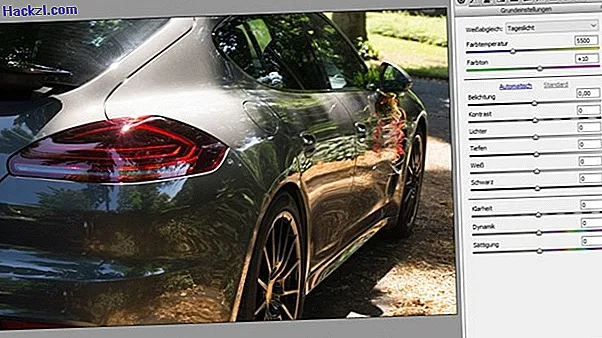
Премахнете жълтия нюанс във Photoshop: баланс на бялото с изображения във формат RAW
Най-лесният начин да решите проблема е вашите изображения да са във формат RAW. При отваряне с Photoshop автоматично се появява голям диалогов прозорец, в който можете да задавате всякакви неща.
- С падащото меню "Баланс на бялото" можете да избирате от няколко предварително определени цветови температури, които най-вече предлагат подходяща настройка за вашата снимка. Регулирайте баланса на бялото на камерата, за да предотвратите изместване на цвета.
- Освен това можете, разбира се, да играете внимателно с контрола на цветовата температура, за да премахнете жълтия оттенък от снимката си. Не забравяйте да вземете предвид цветовия тон за финалната настройка.
- Също така имате възможност да направите допълнителни настройки на експозицията.
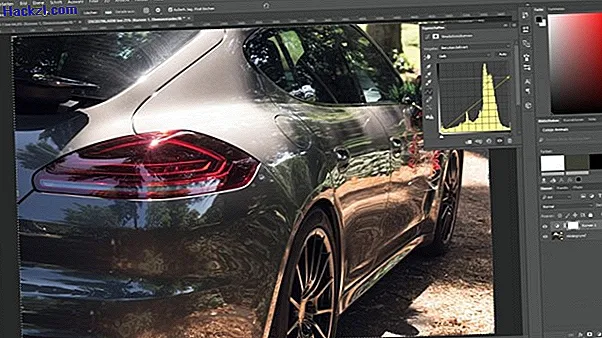
Премахване на жълт нюанс: настройка чрез криви на градация на CMYK
Ако изображението ви не е във формат RAW, а само във формат JPG, все още има точни начини да премахнете жълтия тон от изображението.
- Първо преобразувайте изображението си в печатащите мастила CMYK, за да можете да обработвате жълто като цветен тон изолирано. За да направите това, щракнете върху "Изображение", "Режим" и накрая върху "CMYK цвят".
- Тъй като CYMK е по-голямото цветово пространство в сравнение с RGB, точните цветови тонове се оценяват от Photoshop. Това става с помощта на цветни профили. Трябва да потвърдите преобразуването на цветовете в отделен диалогов прозорец.
- Използвайте бутона с наполовина запълнения кръг в прегледа на нивото, за да създадете ново ниво на настройка и изберете кривата на градация.
- В новоотворения прозорец можете да изберете жълто в долния падащ цвят. След това дръпнете малко горния десен ъгъл надолу, докато не харесате резултата от картината.
Жълт нюанс във Photoshop: настройка чрез цветен баланс и нюанс / наситеност
Друг прост, но полезен начин за премахване на жълтия нюанс е да направите корекции, като използвате плъзгачите "Баланс на цвета" и "Оттенък / Наситеност"
- Можете да получите достъп до "Цветен баланс" с помощта на бутоните "Изображение" и от менюто "Корекции". "Hue / Saturation" може да се намери в същото меню. Играйте с контролите, докато резултатът ви не ви хареса.
- Всички настройки от тази област трябва да бъдат координирани, което прави този процес малко тромав и грозен. През повечето време резултатът не е толкова хубав, колкото кривата на градация, защото се губи някаква информация за изображението.

Adobe Photoshop CC: Иновации в първия тест
Този практичен съвет ви показва как да промените цвета на очите с Photoshop.