
Windows: скриване на файлове и папки
В многопотребителни системи като Windows може да е необходимо да се скрият папки и файлове, за да се предотврати достъп до други потребители.
Бързо скриване на файлове и папки
Най-простото решение е да зададете така наречения скрит атрибут.
- За да направите това, щракнете с десния бутон върху съответния файл или папка и отидете на "Свойства".
- Поставете отметка в квадратчето до „Скрито“ и потвърдете с „Прилагане“.
Скриване на файлове и папки безопасно от определени потребители
За съжаление, споменатата по-горе мярка може лесно да бъде заобиколена от всеки потребител, тъй като File Explorer предлага възможност за показване на скрити файлове или папки. Със следните инструкции можете да регулирате достъпа много по-ефективно. Ето как работи:
- Просто преместете файловете и папките, които да бъдат скрити, в колективна папка, достъпът до която можете да регулирате.
- Сега щракнете с десния бутон върху папката и изберете опцията "Properties" от контекстното меню.
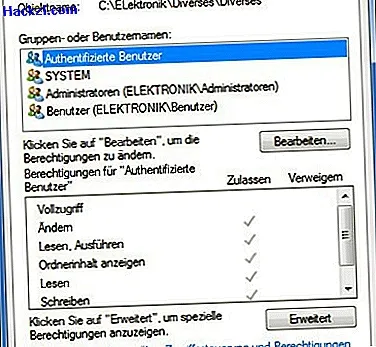
- В раздела „Защита“ ще видите потребителските групи под „Име на група и потребители“. Ако кликнете върху конкретен, можете да видите кои права има потребителят в полето по-долу.
- Вече можете да създадете нов потребител, чиито права искате да ограничите, или да отмените съществуващ.
Добавете потребители, чийто достъп искате да ограничите
Ако искате да определите нов потребител, първо продължете както следва:
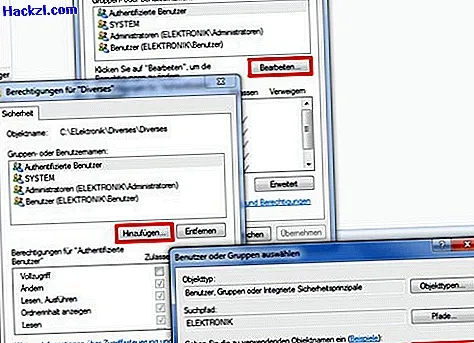
- Сега кликнете върху бутона [Редактиране] и след това върху бутона [Добавяне].
- В прозореца "Избор на потребители или групи" въведете името на потребителя, например "Sven", след което щракнете върху бутона [Проверка на име] и след това върху бутона [OK].
Анулиране на правата на потребителите върху папки и файлове
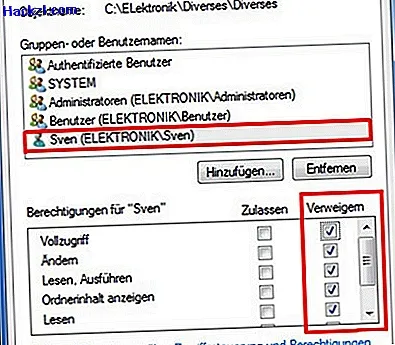
- Потребителят „Sven“ вече е в списъка, който вече знаете от точка 1. Сега маркирайте потребителя "Sven", като просто кликнете върху неговото име.
- В долния прозорец „Разрешения за„ Sven ““ вече можете да видите текущите настройки за оторизация. За да премахнете целия достъп до директорията от Sven, щракнете в колоната "Отказ" в квадратчето "Пълен достъп" и след това приложете настройките, като кликнете върху бутона [Приложи].
- За да изтеглите достъпа до други потребители, просто щракнете отново върху бутона [Добавяне] и започнете отново с стъпка 2.
- Щракнете върху бутона [OK], ако не искате да добавяте повече потребители или групи към списъка.
Моля, обърнете внимание, че присвояването на права под Windows е много по-сложно, отколкото е показано в този малък пример. Всеки потребител с административни права може да отмени настройките, посочени по-горе - това обаче се отнася за всички настройки. Например, ако искате да настроите ограничителни права за присвояване в мрежа на малка компания, важно е да се занимавате с тази тема по-интензивно.
Прочетете как да защитите папка с парола в Windows 7 тук.